Amber Webb recounts a fond memory of a jar of Indian pickles enjoyed on a snowshoeing trek in Colorado. Though she fails to recall her adventuring companions, she perfectly remembers the flavor of the pickles in the snow.
Canning, for Webb, is a skill that has been both a source of pleasure and a job. She’s taught canning at the Larimer County Extension Office for seven years, and before that, she obtained a degree in nutrition and worked on a student farm in Pennsylvania.
“Canning can be very practical for the home gardener and essential for the homesteader,” she says. It can also help you “hold on to your harvest, providing amazing food in the middle of the winter season.”
Melissa Gonzalez, of Windsor, began canning in 2014 with a group of running partners in California who wanted to make Christmas gifts. For her, part of the importance of canning is control over what her family eats.
“I really enjoy knowing what is going into my jams and jellies,” she says.
Those initial jams and jellies were so popular that Gonzalez’s friends requested she make them available year-round. When she moved to Colorado and decided to start selling them, she began to research canning in earnest. She even entered her jelly at the Larimer County Fair, taking first place in 2023.
Gonzalez is known for her pepper jellies, which she sells at the Windsor Farmers Market on most Saturdays. This year’s most popular flavor is her pineapple habanero, and many of her regulars request it “as hot as possible,” she says.
Even though Gonzalez tells beginners to have fun, she warns that canning isn’t for the faint of heart.
“It is quite a process,” she says, “and sanitizing takes a long time.”
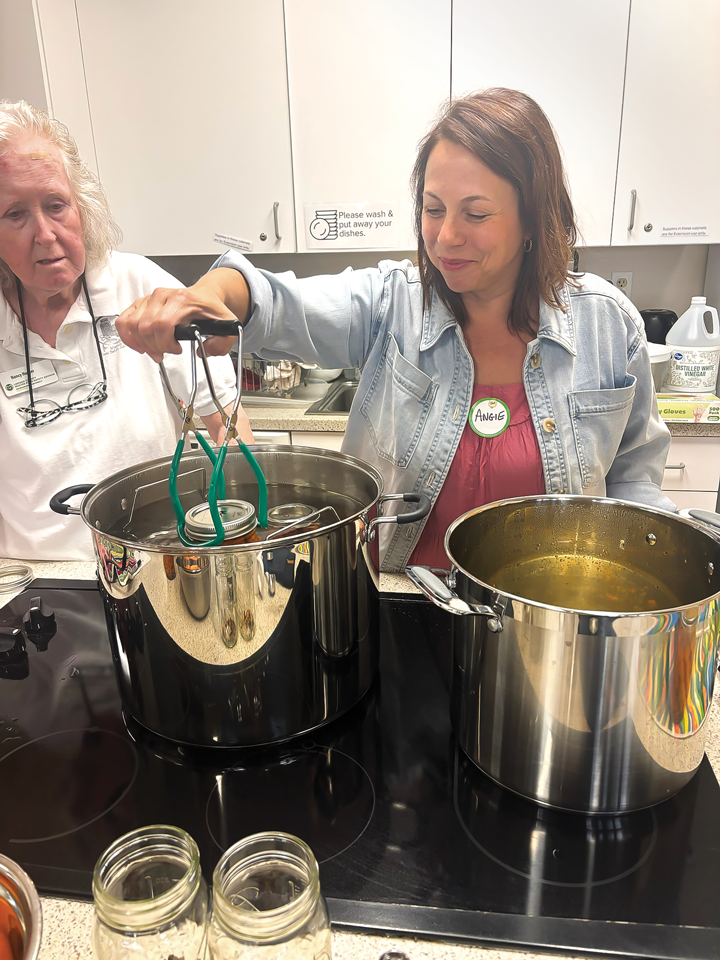
Angie Grenz at a Larimer County Extension water bath canning class.
Caveats of canning
Webb recommends beginners start with water bath canning, which is easier to get right and suitable for high-acid foods such as fruits, vegetables, jams, jellies and things that are pickled. Pressure canning, another preservation method, is used for low-acid foods, like meats, soups, stews and broths, and can be trickier to master.
Water bath canning is easy if you follow directions closely and adjust the recipe for high altitude, which generally means boiling the water longer. In fact, the boiling required in water bath canning naturally kills the bacteria that can lead to botulism, a deadly contaminant and one of the most common in canned food.
Botulism isn’t really a concern with water bath canning, Webb says, but pressure canning is another matter. She recommends a specialized pressure canner and testing it for the correct temperatures every year. Not every food is suitable for canning, such as fats and oils, nuts, beans and super dense recipes, like pumpkin pie filling. Instead, you can cut dense vegetables, like pumpkin, and can them, then puree and finish them for pies when it’s time to bake.
Not every canning recipe should be trusted, and Webb doesn’t recommend home canners formulate their own recipes, especially if they are new to canning. Webb and the Larimer County Extension Office don’t recommend using recipes written prior to 1996, which often contain outdated techniques and predate much of the current food safety knowledge available for home canners.
“The acidity of soil and vegetables has also risen in more recent years,” Webb says, which can affect many canning recipes.
Recipes can be found from a variety of sources that have been tested, and they often include adjustments for high altitude. Webb recommends recipes from the Larimer County Extension website, the USDA and from Ball, a recognized manufacturer of canning jars.
High elevation means water takes longer to boil, Webb says, and foods need to be boiled longer to reach the correct internal temperature. Colorado State University has a website, preservesmartcolorado.colostate.edu, that can adjust any recipe for elevation.

Photos by Angie Grenz.
How to can using a water bath
You’ll need a large pot to boil the water and an insert that will keep the glass jars off of the bottom of the pot, plus a jar lifter, funnel, glass jars of the appropriate size, hot pads, lids and rings. Then follow these steps:
1. Place the insert in the pot and fill it halfway with water. Begin to warm it, then place your glass jars in the pot.
2. Fill the jars with your desired recipe using a funnel. Each recipe will recommend a measurement of canning salts and a specific amount of headspace, or the amount of air between the contents and the lid. Canning salts cannot be interchanged with other salts without adjusting the recipe.
3. Once the jars are filled to the appropriate level, generally with a quarter- to half-inch headspace, use a bubble wand to get rid of the air bubbles by poking the filling up and down. This step allows the air to escape and helps ensure the proper seal on the jars. It will also allow the filling to settle: You may have to add more filling to bring it back up to the correct headspace.
4. Clean the rims of the jars and place the lids and rings on them. Webb recommends tightening the lids until just barely tight, which will allow the oxygen to continue to escape and help the jars and lids properly seal.
5. Carefully place the jars with their lids and rings into the heated water, being careful not to tip them. Once all the jars are placed, bring the water to a full rolling boil, making sure the water is at least two inches above the top of the jars. Do not start your timer until the water is at a heavy boil. Each recipe will have its own boil time.
6. Once the timer is done, turn off the heat and allow the jars to sit in the water for five minutes. Use the jar lifter to bring the jars straight out of the water. Place them on a protected surface and allow them to sit for 24 hours.
7. At around 12 hours, check to make sure the lids have sealed. The jar lids should be concave with no give for a proper seal. If the jars haven’t sealed properly and they haven’t sat for 24 hours, you can move them to the fridge and eat the contents or try the canning process again. Once the 24 hours are up, remove the bands and inspect them for leaks.
8. Store the jars without the rings until you enjoy them or gift them. This way, if there is any remaining water, it won’t rust under the ring and contaminate the product. Consume within a year after canning.
More Canning Tips
Webb offers some additional advice for the home canner:
Use fresh produce. The freshest ingredients will make the best canned product. “Can within 24 hours after harvest, if at all possible,” she says.
Be cautious when using a glass top stove. The large water pot with filled jars has been known to break the glass under its weight. Consult your manufacturer to ensure that your cooktop is rated for canning.
Don’t reuse the lids. Rings can be reused, and older glass jars are considered safe as long as both the ring and jars are in good condition. Canning lids, however, are only guaranteed to seal one time and shouldn’t be reused.